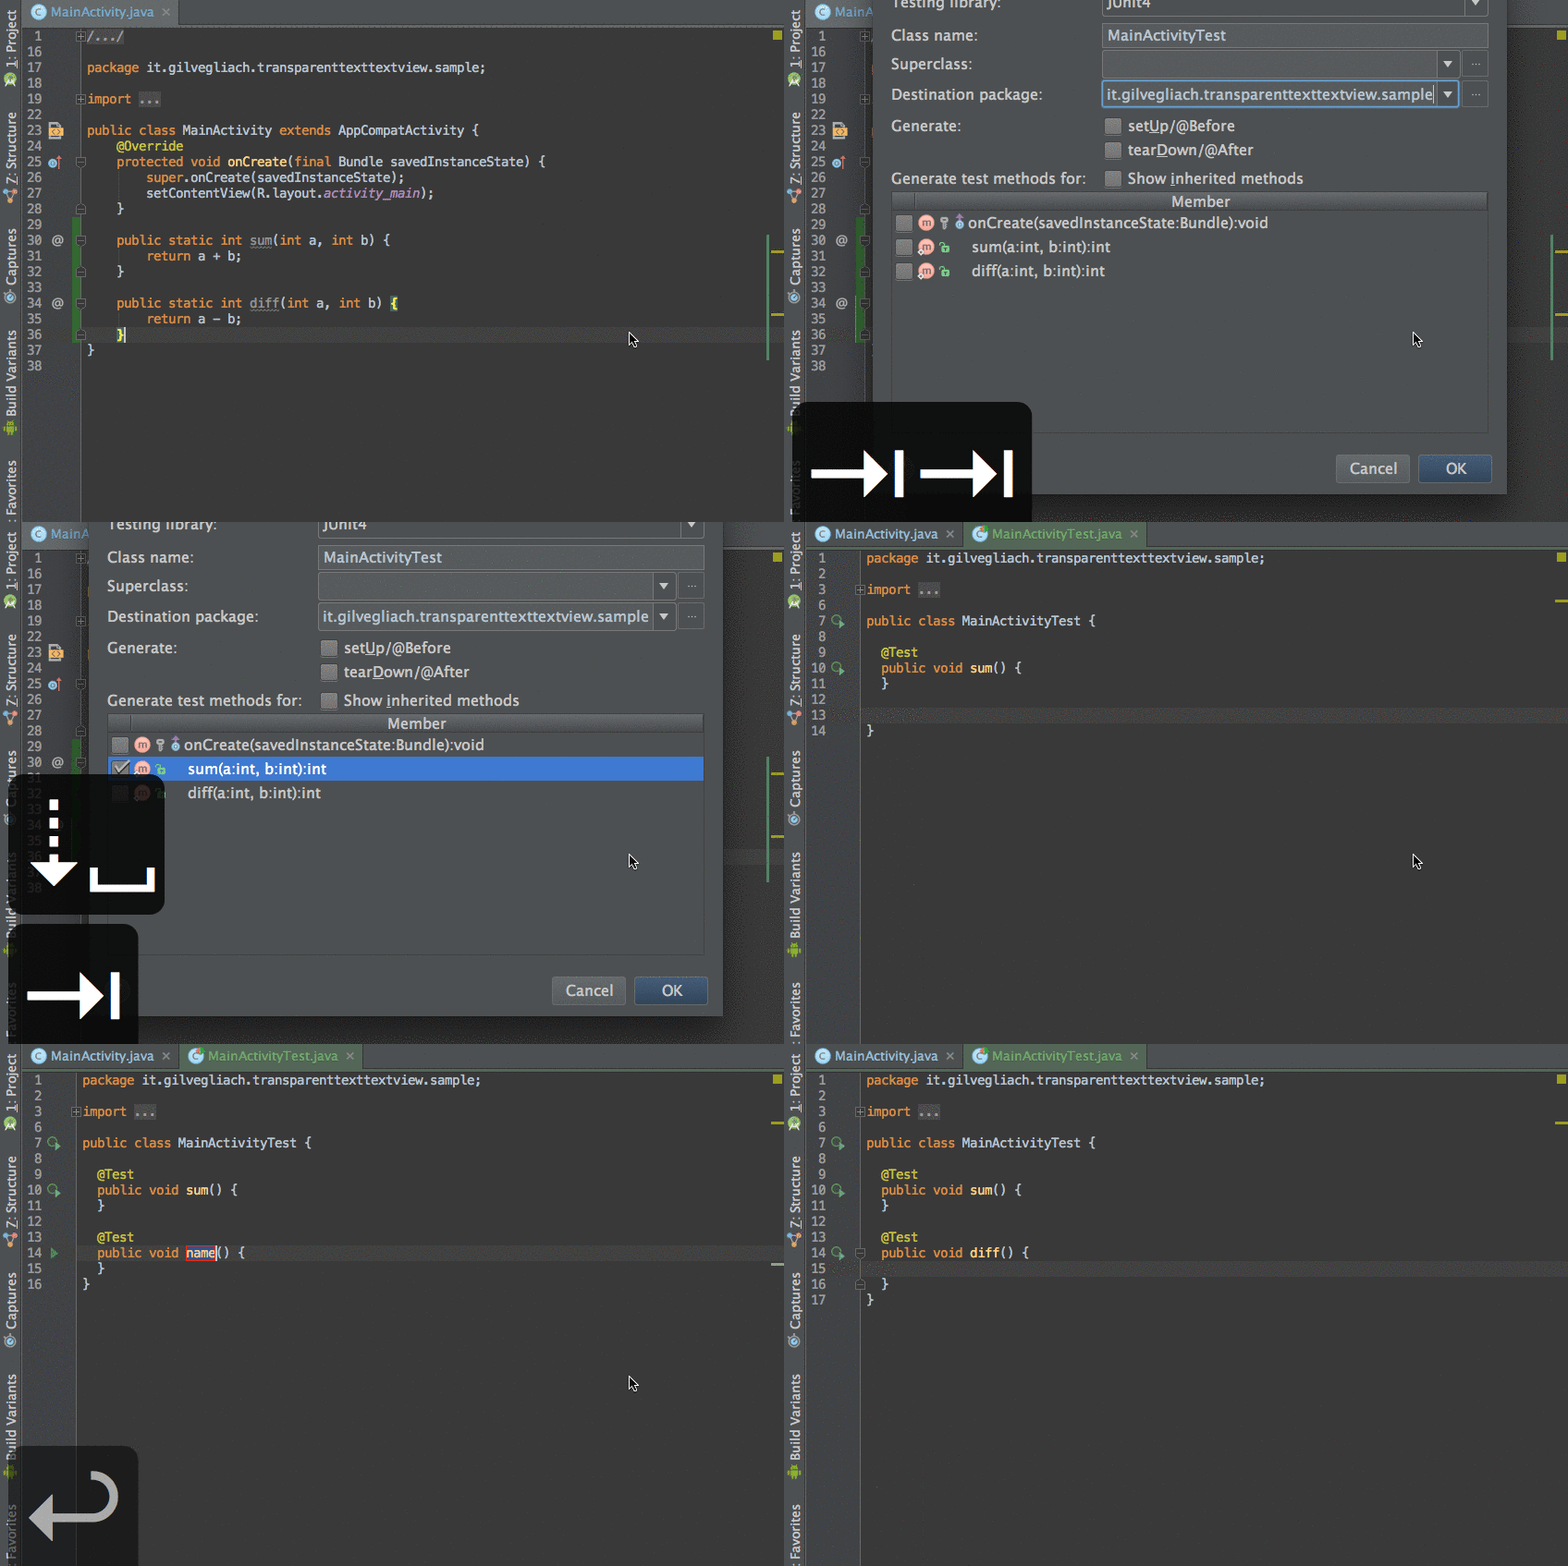
Testing is an important part of the development process. Today we will leverage Android Studio shortcuts to create and run unit tests faster and without using the mouse.

This is my usual workflow, see also the gif. You can change the shortcuts in `Preferences > Keymap` (open with `Cmd+,`) navigating to the entries in parentheses.
1. Make sure the file you want to unit test has focus in the editor.
Otherwise press `Esc` to give it focus.
2. Press `Shift+Cmd+T` (`Main menu > Navigate > Test`). A small window pops up: you can create a new unit test pressing `Enter` or jump to old ones, if there are any.
3. A dialog for creating the tests pops up. Move around with `Tab`, select options with `Space`, confirm with `Ctrl+Enter`.
4. If Android Studio doesn’t create the test immediately or doesn’t let you put the test in `src/test`, it means there is no such folder. Right click on `src > New > Directory` and enter `test/java` to create the test folder. Alternatively, you can bind a custom shortcut to create a folder in `Preferences > Keymap`: I use `Shift+Cmd+P`.
5. In the test class press `Cmd+N` or `Ctrl+Enter` (`Main menu > Code > Generate`) to show the `Generate` menu. Press `Enter` on `Test Method` to generate a unit test. You can modify the default template with `Cmd+N > Right > Edit Template`. In my template, I removed the prefix `test` in the test method name, the `throws Exception`, and the newline after `${BODY}`.
6. To jump back to the production code press again `Shift+Cmd+T`.
7. To run a test, position the cursor on the relative method and press `Ctrl+Shitft+R` (`Other > Run context configuration`). To debug it `Ctrl+Shift+D` (`Other > Debug context configuration`). To run all the tests in a class do the same on the class name.
Happy testing!